New England Clam Chowder
March 24, 2008

I adore clam chowder out of all proportion to where I live (sadly, nowhere near New England). So it came to mind the other day when I was thinking of the foods I would like to have while the last gasps of winter are still blowing across my backyard. Warm, hearty foods that will be out of rotation once spring and summer arrive with all their bounty and my unair-conditioned kitchen stops beckoning.
I’ve always considered clam chowder something to order out, not something to make at home. But the last few restaurant versions I’ve tried have made me long for something better, fresher tasting, less paste-like. Upon consideration, I decided it was completely doable. Plus it was an opportunity to play with fresh clams, still in their shells, and use some more of my home-cured bacon. For my first attempt at clam chowder, the results were stunning (and faster then going out). Deeply-flavored and creamy, this chowder is studded with red potatoes and chewy bits of clam throughout.
New England Clam Chowder adapted from The Best New Recipe, serves 2-3
- 25 littleneck clams, washed and scrubbed clean
bring 2 cups water to a boil in a large stockpot. add clams and cover. cook 5 minutes and stir to check that clams have just opened. if not, recover and steam until they open. fish the clams out of the pot with a slotted spoon and reserve the steaming liquid. remove the clam meat from the shells over the reserved liquid to catch any tasty clam drippings. mince the clam meat roughly and set aside. pour the reserved clam liquid into a measuring cup, leaving the last couple tablespoons of liquid and any sediment in the bowl. add water to make 2 1/2 cups.
- 2 slices thick-cut bacon, cut into 1/4 inch pieces
- 1/2 large white onion, chopped medium
- 1 tablespoon all-purpose flour
fry the bacon over medium low heat until crisp. add the onion and cook, stirring occasionally, until golden and softened ~ 5 minutes. add the flour and stir until lightly colored ~ 1 minute. add the reserved clam broth, whisking constantly.
- 3/4 pound red potatoes, or another waxy variety
- 1 bay leaf
- 1/4 teaspoon dried marjoram
add and simmer until potatoes are tender ~ 10 minutes.
- 2/3 cup heavy cream
- 1 tablespoon fresh parsley, minced
- salt and fresh-ground pepper to taste
add and bring back up to a simmer; remove immediately from the heat. discard the bay leaf. serve immediately.
Shad Roe, Two Ways
March 3, 2008

Earlier this spring, I decided this year was the year. The year I was at least going to try it. I’m normally a pretty adventurous eater, generally willing to try new things. But I had put off trying shad roe for for a couple of years now and it had become one of my darkest waitressing secrets. “Oh, the shad roe?” I’d say brightly. “It’s excellent here.” Or so I’d heard. Then I would wait for the inevitable question, and cringing, try to explain that shad roe were two paired lobes of egg sac of the shad without using the words “egg sac,” which usually make guests wrinkle their noses and shake their heads. Shad roe eaters are a club of their own and, in my waitressing experience at least, if you don’t already know what it is, chances are you don’t want to.
But, other than the egg sac concept, I loved the idea of shad roe. It’s intensely seasonal, a harbringer of spring, and local to boot. Shad run up the East Coast every spring to spawn in fresh water and fishermen in the Chesapeake Bay and the Hudson River celebrate their coming with shad bakes and festivals. The fish itself is flavorful, but quite bony, making it a challenging eat. The roe itself has been described as rich and “tasting of the sea,” a bit briny.

Still slightly apprehensive, I did not want to try the roe at work, scarfing it down as I tried to finish my sidework at the end of the night. I decided this should be an occasion of sorts and so I talked Chef into letting me bring my shad home to cook myself. I wrapped them up and carefully brought them home. At which point R., my (kitchen professional) boyfriend, mentioned that they could be difficult to saute properly, being liable to burst at high temperatures, and casting a bit of doubt on the whole enterprise. So I began my research, finding that the generally accepted solution to this bursting problem is a light poaching followed by pan searing for color. I had settled on this method when I came across a recipe from Jasper White’s Cooking from New England via The Spiral Staircase. Mr. White seemed to have put quite a bit of thought into the preparation of shad roe and anyone who wants to poach food in butter has my heart from the get go. All this, paired with his cautionary words on popping fat, and I was sold.
“Shad roe does not take well to any type of intense heat. It requires gentle cooking. If you wish to saute shad roe, you must gently poach it first. It is too delicate to saute from the raw state. You can . . . then season and dust the roe with flour before slowly browning it in butter or bacon fat. Be careful of popping, which can throw hot fat far enough to burn the cook. Over the years, I have tried just about every known method for cooking shad roe. Still not completely happy, I invented my own method, which pays heed to the most important elements in cooking shad roe: slow cooking and basting. The trick is to find a saute pan that is just barely big enough to hold the roe. For one pair weighing about six ounces a six-inch pan with one-inch sides is perfect; for two pairs of that size, a nine-inch pan is about right. The roe is roasted slowly in this pan with enough sweet butter to almost cover the lobes. This eliminates basting, and since the dish is started from the cold state and uses a very gentle cooking, it also eliminates poaching. When the roe is perfectly cooked, it is transferred to a warm plate to rest for just a moment, while you prepare a brown butter from the butter in the pan… Serve one piece of lobe as an appetizer or two as a main course. I think the richness of this dish, however, makes it more appropriate as a starter.”
So the cooking method decided, I was torn between a lemon caper butter that the restaurant relies on or a more traditional approach, one that would let me use some of my home-cured bacon. I dithered for a while before deciding that it was a sign that shad roe come paired with two lobes and I was meant to try both. The lemon caper butter approach would use up the butter I had needed to poach the roe and would pair with some grilled bread. I put R. and his professional background in charge of this while I worked out what to do with the bacon. Bacon, grits, and roe seemed to be a theme in my readings. Going along those lines, I would fry up some bacon, build a pan sauce with brandy and serve this roe variation with some of my smoked tomato grits, which are good enough to deserve a post of their own.
Honestly, after all this build up, the roe seemed almost anticlimactic. It was good, with a mild flavor and a texture not unlike the grits that I paired them with. The acidic counterpoint of the lemon and capers paired beautifully with the roe and anything with bacon is yummy in my book. I would eat roe again, but probably not seek it out, and that’s okay, because now I know what all the fuss is about. You can send me my shad roe club membership card, because now I’ve tried it.
Shad Roe, Slowly Roasted in Butter
adapted from Jasper White’s Cooking from New England
preheat oven to 350 degrees.
-
1 pair shad roe lobes, about 6 oz
-
salt and freshly ground black pepper
wash shad roe and gently pat dry. season with salt and pepper.
-
6-8 tablespoons unsalted butter
place a 6-inch saute pan on medium low heat and melt 6 tablespoons of the butter. slip the shad roe into the pan, making sure that the melted butter is covering the lobes. if not, add a bit more. place the pan into the preheated oven. check the thickest part of the roe after 12 minutes for firmness. if still soft, cook a bit longer. remove to a warm plate.
Lemon Caper Pan Sauce and Grilled Bread

pour off part of the melted butter from the pan and reserve to brush grilled bread, leaving behind 3-4 tablespoons. place over medium heat to brown the butter. toss in
-
1 tablespoon salt-cured capers, soaked and dried
-
juice of 1/2 a lemon
-
salt and pepper to taste
swirl to incorporate.
-
2 slices of baguette, cut on the bias, toasted or grilled, brushed with any melted butter left
Brandied Bacon Pan Sauce

-
2 slices of thick-cut bacon
fry up bacon until crisp. remove from pan and remove pan from heat. add
-
1/3 cup brandy or bourbon
swirl and light with a long kitchen match. season to taste with salt and fresh ground pepper. if I tried this again, I would probably add a pinch of flour to the bacon grease to make a thin roux or some heavy cream after the brandy to make a more finished sauce.
Merguez Sausage
February 24, 2008

I decided to start my sausage-making attempts with merguez sausage because, not only does it incorporate some of my favorite flavors – spicy and lamby with North-African influences, but you can’t find it around where I live. It didn’t hurt that I could cheat on grinding the meat as my local butcher, Danny Rohrer, carries ground lamb. The way I saw it, I was going to attempt to make and stuff the sausage, and learning one step at a time was enough.
With preground meat, the sausage-making was a snap. I tossed the spices into my KitchenAid, mixed in the lamb, and incorporated the red wine and water until the mixture had achieved what is called its “primary bind.” All this means is that the spices and meat have come together in a sticky ball. I tried to work quickly to keep the meat well-chilled, apparently a key point in sausage-making. Charcuterie warns often that letting the meat get warm will affect the final texture of the sausage, and recommends chilling between steps of the process.
So warned, I put the bowl of sausage in the freezer to get cold again and pulled out the sheep intestines, “natural casings”, I had received in the mail earlier in the week. And this is where things began to get a bit dicey. You can at this point merely portion your sausage and use it loose in recipes or in patty form, freezing what you will not use in the next day or so. Or you can attempt to wrangle it into a sheep intestine to form links. Upon my first whiff of the casings, I will admit to having doubts about the whole process.
But the book said to soak the casings and so after separating out 3 strands from the salty lump of intertwined casings, I put them in water and walked away for a half hour or so. Which vastly improved my state of mind. I came back ready to rinse and rerinse the casings, determined that I could do this. The smell having dissipated rendered the casings much less scary, kind of slippery and wiggly and amazingly strong for something so thin. It wasn’t until I started to rinse the insides of the casings that they began to knot up on themselves, which made the process an exercise in patience. Finally (and more quickly than it seemed, I’m sure), the casings were ready.
I hooked up my KitchenAid food grinder attachment with the sausage stuffer, slid one of the casings up over the tip, and promptly had to call for help. R. obliging left his accounting homework behind and came to the rescue. Between the two of us, we wrestled the sausage into the casing, though it was not an easy job. We have some ideas for the next round (freezing the meat in indivdual balls or tubes that would fit into the feeder tube?), but if anyone has any suggestions on how to sucessfully tame a KitchenAid sausage stuffer, they would be much appreciated.
To celebrate the sausage wrangling, we took the last of the unstuffed sausage and fried it up with potatoes into an impromptu hash. The spicy red-pepper flavors of the lamb merguez mingling with the crisp potatoes. Along with eggs sunny-side up, yolks golden and still runny, we sat down to breakfast for dinner, always a comforting reward at the end of a hard job…

Merguez Sausage
adapted from Charcuterie, makes quite a bit of sausage
-
2 tablespoons kosher salt
-
1 teaspoon sugar
-
1 teaspoon red pepper flakes
-
2 tablespoons garlic, minced
-
3/4 cup roasted red pepper, diced
-
1 teaspoon fresh ground black pepper
-
1 tablespoon spanish paprika
-
1 tablespoon fresh oregano, minced
combine all above ingredients in the bowl of a stand mixer with the paddle attachment on. add
-
3 pounds ground lamb
mix until incorporated and add
-
1/8 cup dry red wine, chilled
-
1/8 cup ice water
mix on medium ~ 1 minute until mixture has a uniform and sticky appearance. place bowl in refrigerator to chill. portion lamb sausage. stuff into casings if you dare. double wrap any sausage you are not going to use within 3 days in cling film and freeze.
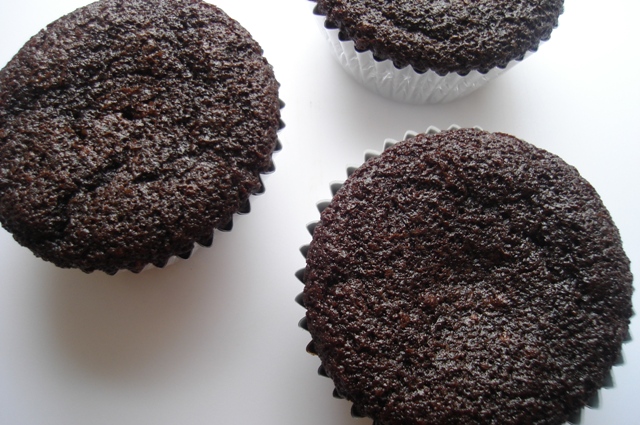
Guiness Cakelettes
February 21, 2008
This was a project with many inspirations. I had been thinking about doing one of the chocolate cakes from Nigella Lawson’s Feast for a while now. I mean, how can you not love a cookbook that has an entire chunk in the middle devoted to chocolate cakes of various descriptions? It’s always the section I ended up in when I flipped through the book. I’ve been keeping up with Kate’s adventures in Ireland over at Accidental Hedonist and pining to be over in Ireland again myself, happily ensconced at a tiny pub with a creamy Guiness in front of me. Plus it was someone’s birthday at work and I had volunteered to make a cake. I felt like a chocolate Guiness cake was meant to be.
Apparently not. Let me get this out in the open right from the start – my first attempt at this cake was a complete failure. Dashing around trying to bake (and even more intimidatingly, ice) a cake before work was a bad place to start. I was trying to get the cake in the oven so it could cool in time to ice it, and, in the rush, added two and a half tablespoons of baking soda, rather than two and a half teaspoons. Trying to mix the flour and baking soda into the rest of the ingredients, the whole thing started foaming, which I assumed was just the Guiness at work. As the batter threatened to come up out of the pan I was mixing in, I began to worry that I was overmixing and would toughen the cake. I decided to go with a pancake batter theory that any lumps of flour would take care of themselves and dumped the whole thing into the springform pan I had so carefully greased and shoved it in the oven.
Twenty minutes later, I smelled the peculiar odor of burning Guiness as the cake crept up and over the edge of the cake pan and began to burn to the sides of the pan. “Nevermind that,” I said to myself, “I’ll just turn it out of the pan when it’s done and it will be fine.” When the cake had finally set in the middle, I pulled it out and put it outside on the back porch (in the twenty-degree weather) to cool quickly. Despite the burned-on cake on the outsides of the pan, the springform came off perfectly and I set to making my icing. It was only as I was icing the cake that I filched a crumb from the bottom, thinking to myself – “That tastes a bit odd, maybe it’s the Guiness” – before realizing my mistake with the baking soda. I cursed my inability to read and follow recipes as I finished the icing, then stepped back. It did look good and maybe it wouldn’t taste so bad after all, I justified. I had promised to bring in a cake and there was no time (or sugar in the house) to start again.
So I took it in, warning the lucky birthday recipient after he blew out the candles that I was unable to vouch for the cake’s edibility. The cake was cut as my coworkers gathered around in a tight huddle to taste what was truly an awful cake. The baking soda made it taste like brushing your teeth with Arm and Hammer, while little lumps of flour, far from having taken care of themselves, floated like little starch bombs throughout. One of the girls asked me what kind of nuts I had used, still trying to be polite. “Nuts?” I replied, before realizing she had mistaken the flour lumps for nuts, giving me the benefit of the doubt. Once it had been determined that the cake was to be headed for the trash (though some of the icing was eaten off the top first), everyone shared stories of their own worst kitchen mishaps, which of course made me feel much better. What else are friends for?
Nonetheless, I felt the Guiness cake had to be redeemed, so two days and a trip to the grocery store later, I started the whole process over again. I refined the process to eliminate flour lumps, excess baking soda, and sour cream (which I had forgotten to buy at the store, but thankful again for my store of powdered buttermilk, a cook’s best friend, simply substituted to no ill effect). I couldn’t face up to the whole cake again so soon, so I decided to take the cupcake route. And give myself plenty of time.
This time the results were solid. The cupcakes had a deep chocolate taste, moist texture, and no faux nut flour bombs. The Guiness was subtle, more of an extra hint of bitter that really complimented the chocolate, than a flavor of its own. The cream cheese icing, which includes heavy cream to, ironically, make it lighter, was creamy and not too sweet. Not quite the same as sitting over a pint in a proper Irish pub, but satisfying still.

Guiness Cakelettes
adapted from Nigella Lawson’s Feast, makes 24ish cupcakes
preheat the oven to 350 degrees. set out cupcake pans with liners/bake cups.
-
1 cup Guiness
-
1 stick plus 2 tablespoons unsalted butter
place the guiness and butter in a large saucepan; place over medium heat until butter is melted. remove from heat.
-
3/4 cup water
-
2 eggs
-
1 tablespoon vanilla extract
whisk together in a large mixing bowl.
-
3/4 cup unsweetened cocoa
-
2 cups sugar
add to mixing bowl and whisk to incorporate. add the guiness butter and incorporate.
-
2 cups all-purpose flour
-
2 1/2 teaspoons baking soda
-
3 tablespoons powdered buttermilk
sift into the mixing bowl, stirring to prevent lumps from forming. mix until throughly combined. pour into cake pan and bake 20-25 minutes. Check the centers of cupcakes with a toothpick. When toothpick comes out clean, remove from oven and place on a rack to cool completely before frosting.
-
1 1/4 cups powdered sugar
place into the bowl of a food processor and pulse to remove any clumps.
-
8 ounces cream cheese
-
1/2 cup heavy cream
cut the cream cheese into large chunks. toss into the food processor and blend, slowly adding heavy cream and checking consistency. frost cupcakes.
Kumquat Marmalade and Buttermilk Biscuits
February 19, 2008
I adore shopping at asian groceries because of the element of suprise, those moments of “what is this?” and “how could I use up this?”. I always end up with something I haven’t had the chance to cook with before. Usually I end these trips at home curled up with Asian Ingredients by Bruce Cost, which provides clear explanations, pictures, and recipes of many things I can’t even begin to pronounce. Wheeling my cart around the produce section, I came across kumquats. Charmed by the idea of tiny citrus and having no idea what to do with them, I took them home with me.
This time though I thought of Chez Panisse Fruits, a cookbook I always flip through with good intentions, happily browsing the stylized relief prints and reading the essays before giving up because I live 300 miles from the nearest Meyer lemon. I rushed home with my kumquats, sure that Alice Waters would approve and I would finally cook something from this beautiful cookbook!
I was right – Alice had some great ideas for me, from a spring onion kumquat relish to candied kumquat slices. Apparently, kumquats are the only citrus in that the skin is sweet and the flesh is tart, which sounded perfect for marmalade to me. The thin skins also mean you don’t have to go through the blanching step that other citrus marmalades require.
Thankfully, I hadn’t bought all that many kumquats, so I didn’t have to feel bad about not actually canning anything, just making a jar to keep in the fridge. The recipe only calls for two ingredients: kumquats and sugar, though I added some lemon juice for brightness, and couldn’t be any easier. The results were stunning, a sweet-tart marmalade with an unusual flavor…

Kumquat Marmalade
adapted from Chez Panisse Fruits, makes a couple of cups
-
1/2 pound kumquats
-
1 cup sugar
-
2 tablespoons fresh-squeezed lemon juice
cut off the stem end of the fruit, then split each lengthwise. slice each half into 1/8-inch moons, removing and discarding the seeds as you slice. place the kumquats into a small saucepan and just cover with water. add sugar and bring to a boil over high heat for 15 minutes, skimming off any foam that comes to the top. reduce heat and continue simmering until the marmalade thickens to the consistency you like. add the lemon juice and stir. let cool, then put in a pretty jar and refrigerate.
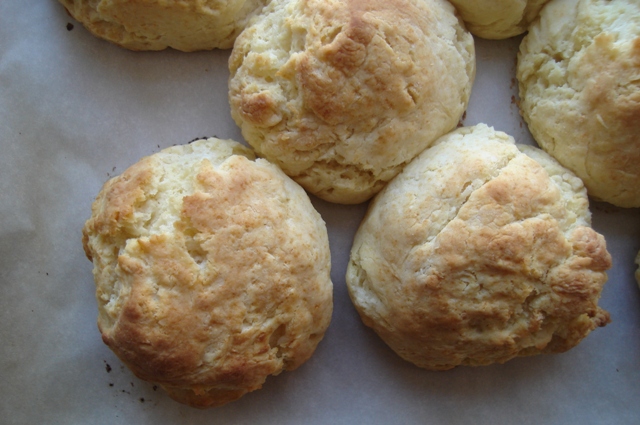
The marmalade came out so well that I decided I needed something to eat it on and with a quickness. For me, that means biscuits, probably my favorite quickbread. I used to be intimidated by biscuit-making and, trust me, I had made my share of hockey pucks to prove why. Two things have revolutionized biscuits for me: powdered buttermilk and a really good recipe. I stand by them both and I now make darn good biscuits to prove it. Ones that are pretty enough for a photo shoot, if they last that long…
I discovered the powdered buttermilk when I was packing foods up for my dad to take on a long hiking trip and I haven’t looked back since. I occasionally buy buttermilk for projects like buttermilk-marinated fried chicken, but it never seemed like I had any around when I needed it for baked goods. If I did buy it for biscuits, I would use half a cup and then the rest would slowly, despite my best intentions, go bad in the fridge. Now I can whip up a batch of buttermilk biscuits without running to the store. Completely worth it, I promise. Go buy some, toss it in the back of your fridge, and you will be amazed how often it comes in handy.
The recipe comes from The New Best Recipe from the editors of Cook’s Illustrated, a cookbook I turn to regularly for baking, and produces the best biscuits I have ever made. Using the food processor, it takes me six minutes flat to get these biscuits in the oven and another ten to bake, which makes them possible for everyday, rather than just special occasions or Sundays.

Buttermilk Biscuits
adapted from The New Best Recipe, makes 8 biscuits
adjust an oven rack to the middle position and preheat the oven to 450 degrees. line an ungreased baking sheet with a piece of parchment (optional).
-
1 cup (5 ounces) unbleached all-purpose flour
-
1 cup (4 ounces) plain cake flour
-
2 teaspoons baking powder
-
1/2 teaspoon baking soda
-
1 teaspoon sugar
-
1/2 teaspoon salt
-
3 tablespoons powdered buttermilk
place into the bowl of a food processor, blitz ten seconds to mix dry ingredients.
-
8 tablespoons (1 stick) unsalted butter, cut into 1/4 inch cubes
sprinkle the butter cubes evenly over the dry ingredients. process in twelve 1-second pulses. add
-
3/4 cup water
process until dough gathers into moist clumps, about eight 1-second pulses. transfer the dough to a lightly floured surface and gather it into a loose ball, being careful not to overmix. cut the ball into quarters, then split each quarter into eighths. with floured hands, shape a rough ball of each piece and place on the baking sheet, about a half-inch to an inch apart. bake for ten minutes, check and put in for a minute or two more if needed to achieve golden biscuit perfection.
Julia’s All-American Potato Salad
February 15, 2008

I was reading Julia and Jacques Cooking At Home yesterday – in bed, I might add. At five pounds of large-format hardcover, this is not the perfect book to cuddle up with. I had put down this book for too long though, and glimpsing it on the shelf, I grabbed it on the way upstairs.
I like this cookbook for the back-and-forth bantering exchange between two such amazing chefs. First, Julia will say “Well, when making such-and such, I like to…”, then on the opposite page, Jacques will say “Julia likes to do it this way, but I prefer…” and come up with a completely different method. It reminds me that there is always more than one way to do something and do it well.
My scrambled egg technique (from Jacques) is flawless. They were, in fact, the first thing I ever cooked for my boyfriend (intimidatingly at the time, a professional cook).
This go around, the book threatening to suffocate me if I fell asleep and the snow falling outside, I was looking for recipes to use some of the beautiful savory bacon I had cured. Flipping through, I came across a recipe for potato salad that included bacon and had the added advantage of tossing the hot potatoes with cider vinegar, a technique I’d never considered.
So this morning when I woke up, I wasn’t too suprised that I had a serious jones for some potato salad, even if it wasn’t picnic weather. It’s one of the first things I can ever remember making, probably in first grade, with some precooked potatoes and illustrated recipe cards. I might have added too much vinegar then, because ever since, I have been a fan of tart potato salad. This one completely fits the bill.

Classic American Potato Salad
adapted from Julia Child in Jacques and Julia Cooking At Home, serves 2 or 3
-
1 pound Yukon Gold, or other waxy variety, potatoes
-
1 teaspoon salt
peel potatoes and slice into 1/2 inch chunks. put in a saucepan and just cover with water. add salt. bring to a boil, then reduce heat to maintain a simmer for 6 to 7 minutes. check potatoes to make sure they are tender and cooked through. drain and toss with
-
2 tablespoons cider vinegar
let sit 10 minutes, tossing occasionally, to absorb the vinegar.
-
1/3 cup red onion, finely chopped
-
2 slices bacon, crisped and chopped
-
1-2 tablespoons cornichons (or dill pickles), finely chopped
-
1 hard-boiled egg, peeled and sliced thinly
-
1 scallion, finely chopped, including some of the greens
combine and toss gently with potatoes.
-
1/3 cup mayonaise
-
1-2 tablespoons sour cream
-
1 teaspoon cider vinegar
-
salt and fresh-ground pepper, to taste
fold into potato mixture, tasting and correcting for balance. refrigerate at least an hour to chill and retaste for seasoning and acidity.
Avocado on the Half-Shell
February 13, 2008

I’m not sure if this qualifies as a recipe, more a technique really, but it is my new favorite. And it is beyond simple. The only real requirement is an avocado in its perfect state, which isn’t hard to find right now. I had almost given up on avocados through the fall; the ones we were finding were stringy and spotted. But then I spotted some on sale last week and bought one. It was everything an avocado should be: creamy and smooth, rich and still somehow green tasting – in a word, perfect.
Since that find, I have eaten at least six avocados I can account for. A couple in guacamole, true, but most eaten out of hand with a spoon, a drizzle of fresh lime juice, and a sprinkling of kosher salt. I find them most pleasing when the flesh has been scored with a knife, allowing me to scoop a couple of chunks out at a time.
I have no problem polishing off a whole avocado by myself this way, but if you are feeling aesetic, or merely want to extend the joy to another session of standing in front of the kitchen sink, savoring each spoonful, you can wrap the half with the seed still in it tightly in plastic wrap, and it will keep for a short bit.
Eaten this way, an avocado is a secret pleasure, one that creates no dishes or mess. Unsullied by competing flavors, one can comtemplate an avocado at its peak, spoonful by each perfect spoonful. Consider it a love letter to oneself.
Olive Oil Semolina Crackers and Hummus
February 11, 2008

Last week, I found another cracker recipe on 101 Cookbooks and decided to take it as a sign. I love crackers and should probably buy some stock in the producers of Triscuits as many as I go through. And I’ve always had a sneaking suspicion that making a batch of my own crackers wouldn’t be too hard – no yeast or rising required, but cracker recipes are relatively few and far between. When Heidi first published a recipe for crackers made with polenta, I was, of course, without polenta in the house. By the time I bought some, the cracker project had been forgotten. So last week’s post on semolina crackers was a nice reminder of that original mission and I happened to have some semolina sitting aimlessly in my pantry.
The cracker dough couldn’t have been easier – all-purpose flour, semolina, salt, extra-virgin olive oil and water – mixed together, portioned out and let to rest. Glossy and pliable, the dough was easy to roll out; I used my pasta roller, which I adore and love any excuse to use, to thin the dough evenly. Using smaller balls of dough than Heidi reccommended, I was able to roll them thinner for a more crisp snap and then finished them in the oven on a hot baking stone.
One of the strengths of this recipe, as Heidi notes, is the ability to play around with flavorings. I started with plain sea salt and fresh-ground black Tellicherry peppercorns, moved on to red pepper flakes and parmesan (which didn’t stick very well), and ended with balti seasoning, a spice mix from Penzey’s that contains coriander, garlic, ginger, cumin, dundicut chilies, Ceylon cinnamon, and quite a few other indian-inspired spices. The balti crackers were my favorite, delicately scented with just a hint of heat.
After finishing the crackers, I wanted to pair a spread with the indian flavors of the balti spice without overwhelming the crackers I had just spent an hour rolling out and baking. Looking through the pantry, I decided on a classic hummus. It’s one of my go-to recipes, something I’ve been making regularly since I discovered it in college, one of my first culinary epiphanies. Concerned about my large consumption of hummus from tiny tubs in the grocery store, my friend Abby dug up a recipe for me. I can remember the awe I felt upon first making it – “This is so easy! And it tastes better! And it’s cheaper! Why didn’t anyone tell me this was this easy?” (I guess Abby did.) And I’ve been making this hummus ever since.
Hummus Bi Tahini
thanks to Abby, makes ~ a little less than a quart, which goes pretty fast at my house
-
2 garlic cloves, minced or pressed
sprinkle the minced garlic with a pinch of kosher salt, then scrape/press it across the cutting board with the edge of a knife to form a paste, breaking down the individual bits of garlic. add to the bowl of a food processor along with
-
2 (15 oz) cans chickpeas, drained and rinsed
-
1/2 cup tahini (sesame paste)
-
1/3 cup extra-virgin olive oil
-
1/4 cup warm water
process on low until oil is incorporated.
-
2 lemons
-
1 1/2 teaspoons kosher salt
-
freshly ground black pepper
-
2 teapoons ground cumin, optional
add the juice of one lemon, salt, pepper, and cumin if you are using it. process until smooth and creamy. taste. add more lemon juice and seasoning to taste. the tasting part is key, as is a bit of restraint with the garlic and lemon. I’ve gone overboard with both in the past in this recipe and I’ve found that tasting carefully for balance between the ingredients is key here. you can also add a bit more warm water if you are looking for a creamier, more dip-friendly texture after you have got the acidity right.
for a pretty presentation, spoon into a serving bowl, make an indentation in the center, pool extra-virgin olive oil in the indentation and sprinkle with za’atar, a middle-eastern spice blend, or a bit of cayenne.
Wilted Spinach Salad with Bacon
February 9, 2008
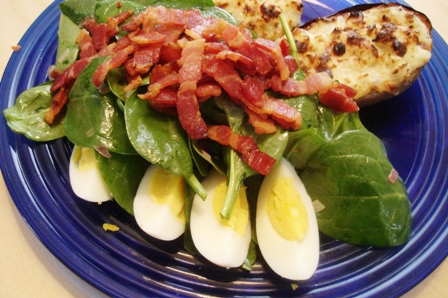
Looking for a way to highlight some of the bacon I just finished making, but not feeling in the mood for anything too heavy, my thoughts turned to a southern classic – wilted spinach salad. I always love the premise – bright green spinach, softened slightly with the heat of the warm dressing, contrasting with the snap of crisp bacon and creaminess of a perfectly hard-boiled egg.
I think the key is in getting the spinach to wilt and gloss over with the warm bacon grease in the dressing, rather than just coat the leaves and clump up. Cooled bacon grease = bad mouthfeel.
Leafing through an old Cook’s Illustrated, I found a solution. By tossing the aromatics in the dressing recipe into the hot pan with the drippings from the bacon and building the dressing around them, the dressing is able to retain enough heat when tossed with the cool greens to successfully wilt the spinach. Think of each bit of onion and garlic as a tiny hot water bottle warming up the greens.
The results were fabulous. The bacon was crisp and perfectly salty, ensconced in greens wilted just enough for contrast.
Wilted Spinach Salad with Warm Bacon Dressing
adapted from Cook’s Illustrated, serves 2
-
2 tablespoons apple cider vinegar
-
1/4 teaspoon sugar
-
couple of grinds of black pepper
-
pinch of salt
mix vinegar with sugar, salt & pepper. set aside.
-
4 slices thick-cut bacon
slice into 1/2 inch lardons. fry in medium skillet over medium-high heat until crisp ~ 10 minutes. remove bacon from skillet with slotted spoon. pour bacon fat into a heatproof bowl. measure 2 tablespoons of the fat back into the pan.
-
1/4 of a medium red onion, chopped (~1/4 cup)
-
1 small garlic clove, minced
add onion to pan & saute over medium heat, stirring frequently, until softened ~ 3 minutes. toss in the garlic, stir 15 seconds. add cider vinegar mixture & remove pan from heat, scraping the bottom of the pan to get all the good, browned bits. swirl and quickly toss with
-
half a bag of baby spinach (~3 oz)
until spinach is slightly wilted. garnish with bacon and
-
2 hardboiled eggs, quartered or diced, if desired
serve before the bacon grease can cool.
Making Bacon at Home
February 8, 2008

My first shot at making bacon seemed much less like cooking to me and more like an exotic collecting expedition. First I had to come up with pork belly, then curing salts – neither of which was to be found at the local Food Kitty.
The curing salts were easily enough found online under the name Insta-Cure #1, so I clicked through and impatiently waited for them to arrive on my doorstep. I have read about the health concerns associated with nitrites, but my sources said they were crucial if I wanted to smoke the meat at low temperatures for any length of time, preventing the dread botulism. And since I had decided early in the process that I would give smoking the bacon a shot, this seemed necessary.
(Apparently it’s not a deal breaker if you finish the bacon in a low oven, though I’m not sure how this would affect the need for the nitrites. Another experiment for another time.)
The pork belly was a little more difficult, with no luck at the local grocery or on a trip to a couple of fancier places in the DC area. (To be fair, I should have called ahead.) But I hit pay dirt at an asian grocer, Lotte Plaza, in Ellicott City, MD. I lunched out in front of a case of pork bellies for a good ten minutes before choosing two perfect pieces.
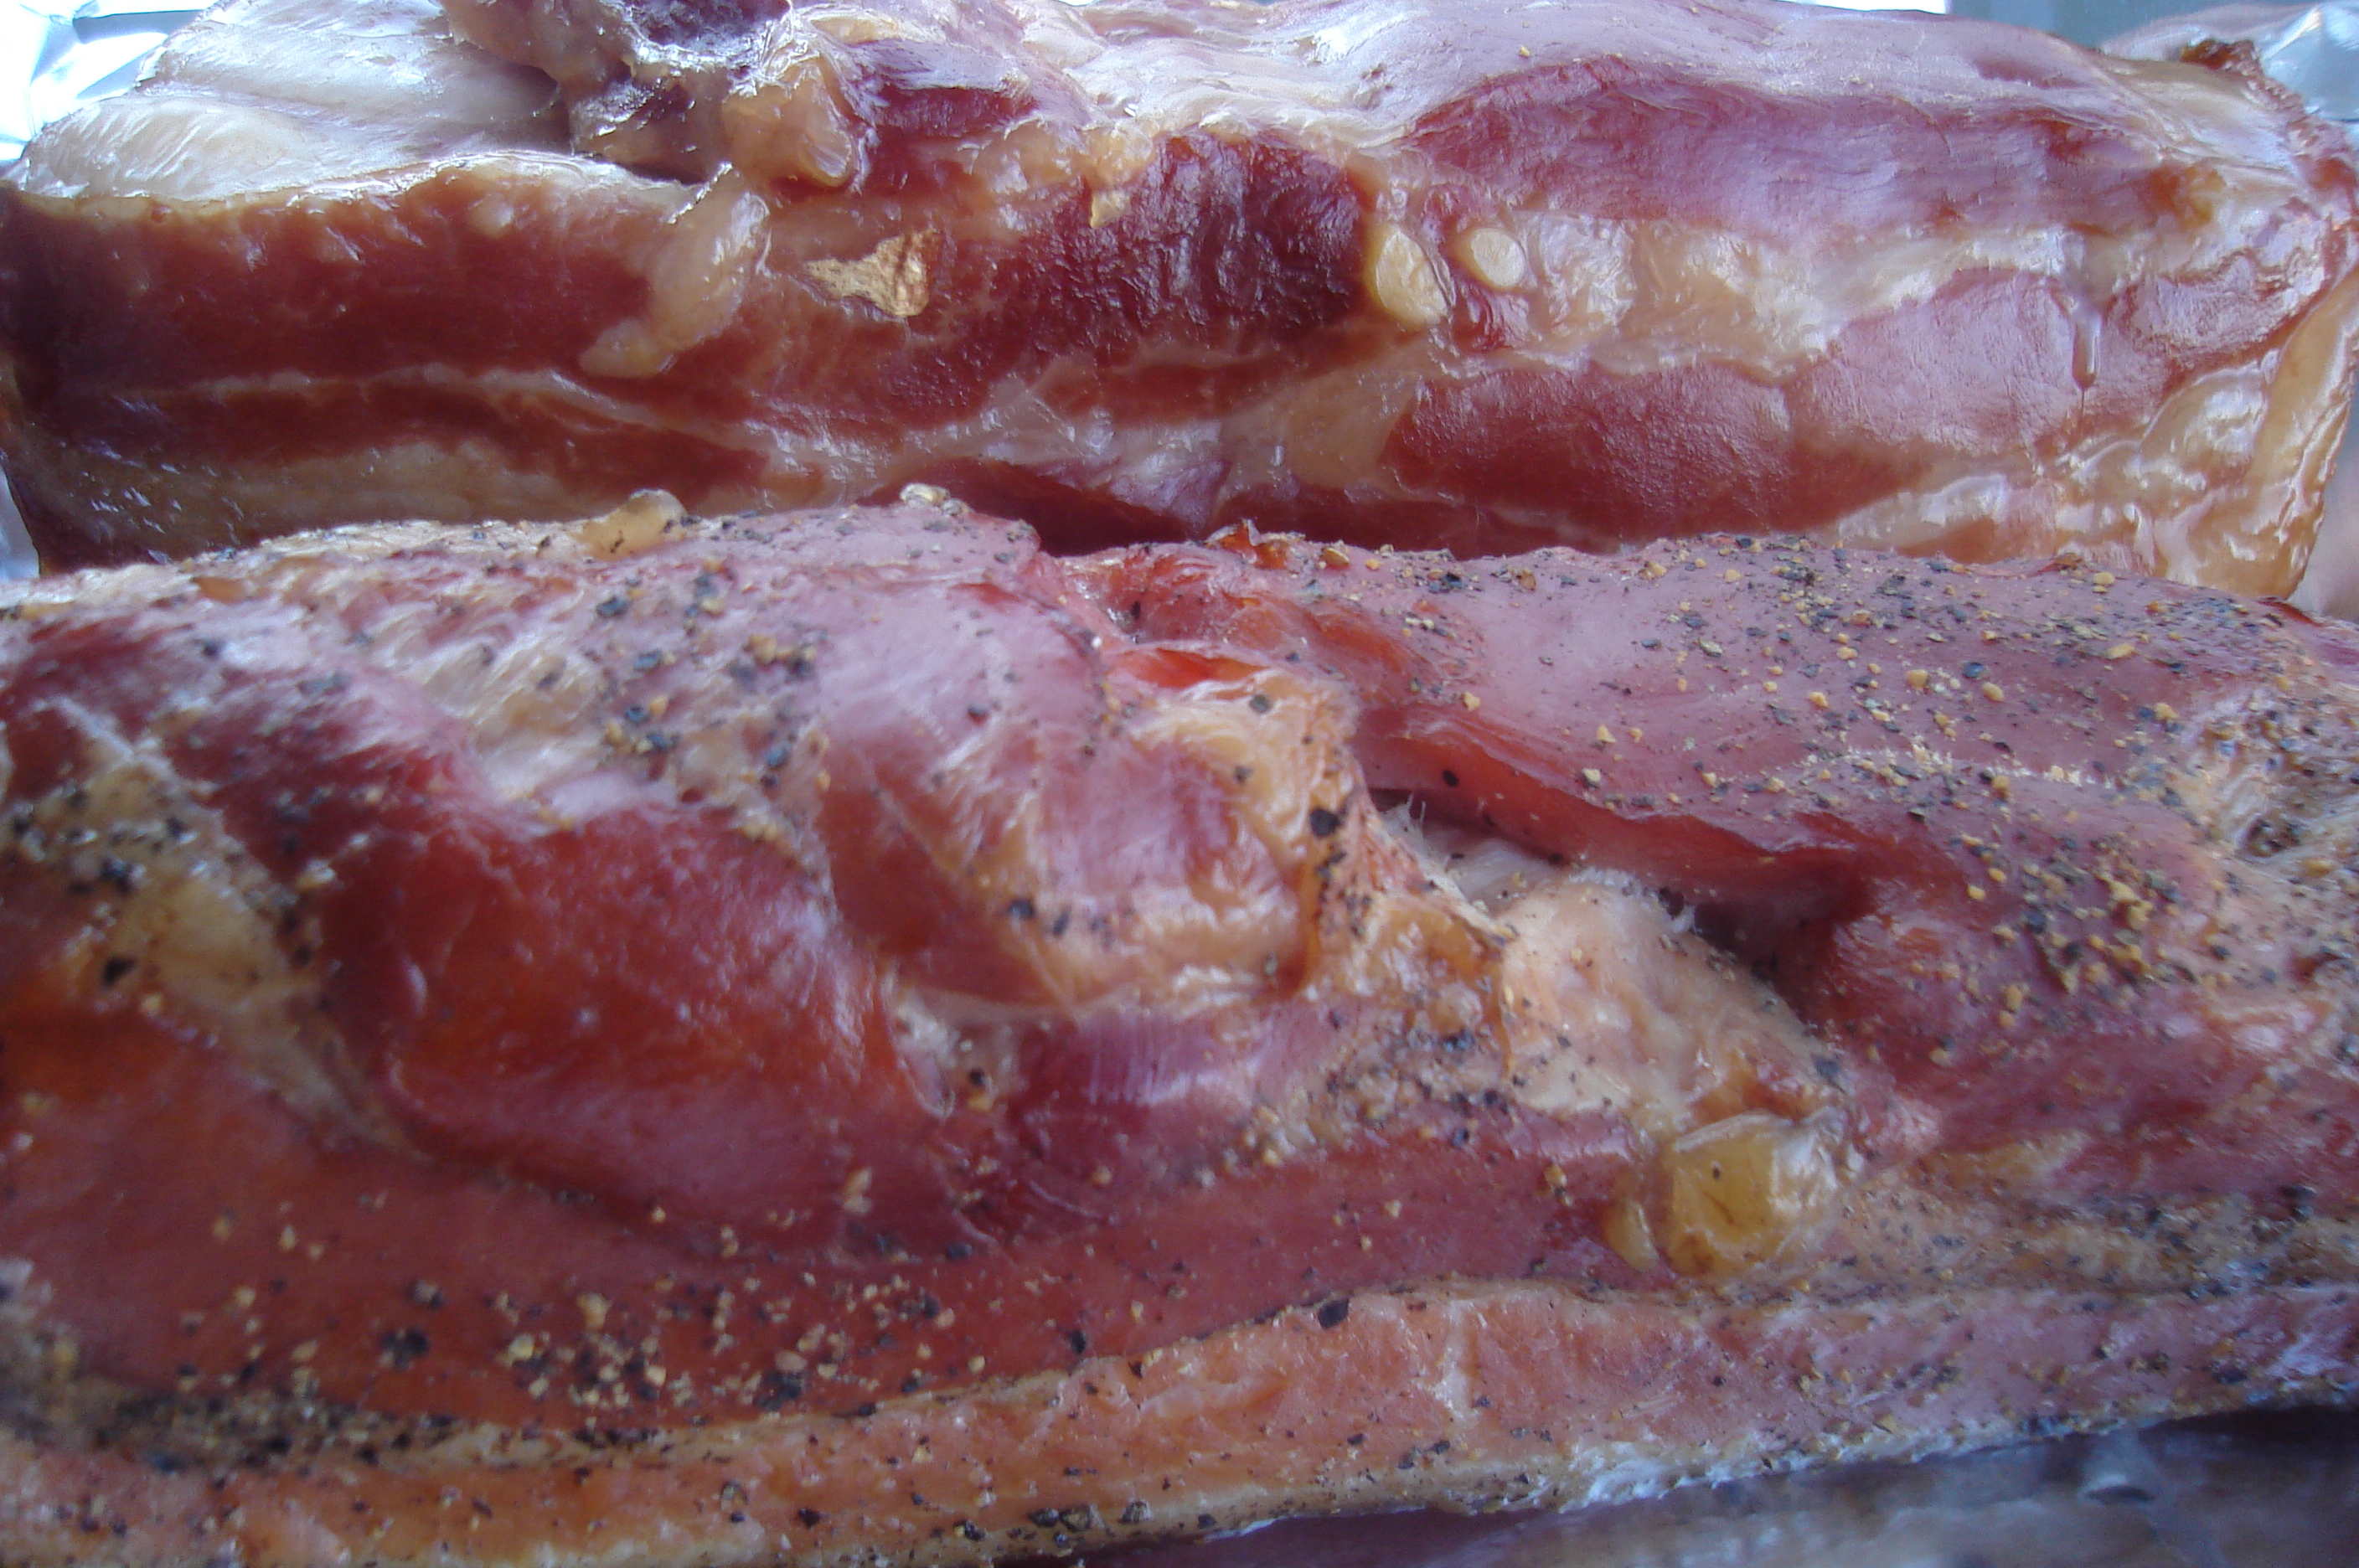
At home, I started the process, using the basic cure recipe out of Charcuterie and adding maple syrup to one belly section and fresh ground black pepper to the other. I adore peppered bacon, but I thought I try out the sweet cure and see how it worked. This part took a total of ten minutes (including the dithering over the maple syrup and my amazement over how truly pink the pink curing salt really is), and the bellies went into the fridge to cure.
The next week consisted of me peering into the fridge and poking at the bellies to try and ascertain whether anything was actually happening in there. R. was much better at actually remembering to turn (and occasionally massage) the bellies on a dailyish basis. But really when it came down to it, flipping them every day or so was all that was required. Not exactly high-maintenance.
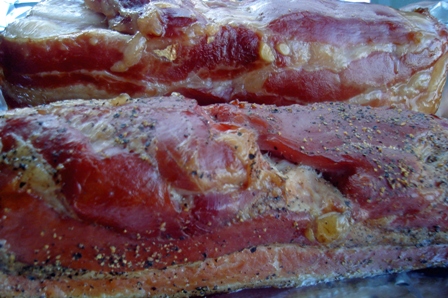
Finally the week was up. The bellies seemed to have firmed up upon poking, so I rinsed and dried them and fired up the grill for some smoking. Full disclosure here – I own a gas grill, not exactly what anyone seemed to be calling for in the how-to-smoke sections of anything I read, but I decided try and see what happened. I soaked some hickory chips I had been “aging” on my back porch for quite a while in hot water and made a packet for them out of aluminum foil. I set half of my grill on the lowest setting, put the packet on that side and the bacon on the high rack on the other side, closed the lid and waited for the bacon to come up to 150°F. Four hours later (and 15 minutes before I had to be at work), the thermometer alarm went off. The bacon was beautiful and smelled, well, you can imagine, like smoky goodness.

